Introduction
As Microsoft introduces Endpoint Privilege Management (EPM) is an important solution for organizations to enhance security. It focuses on managing privileges for endpoints (devices) within an organization. We already have some custom EPM solutions available till date, Byond trust, Thycotic EPM are couple of dominant names since long. But Microsoft realized this as good enhancement in cloud device management.
Key aspects include implementing least privilege, addressing common tasks, and aligning with the Zero Trust model. EPM requires additional licensing, supports specific operating systems, and is managed through the Microsoft Intune admin Center (Endpoint Security). Implementing EPM can significantly strengthen an organization’s security posture.
How to setup EPM for your environment
There re two major policiesss you need to configure in order to setup EPM using Intune, We will go through these two policies one by one.
Step 1: Privilege Management Elevation Client setting
You need to enable EPM client on devices first in order to work. To start with initial installation select “Deny All requests”. Apply this setting to devices.
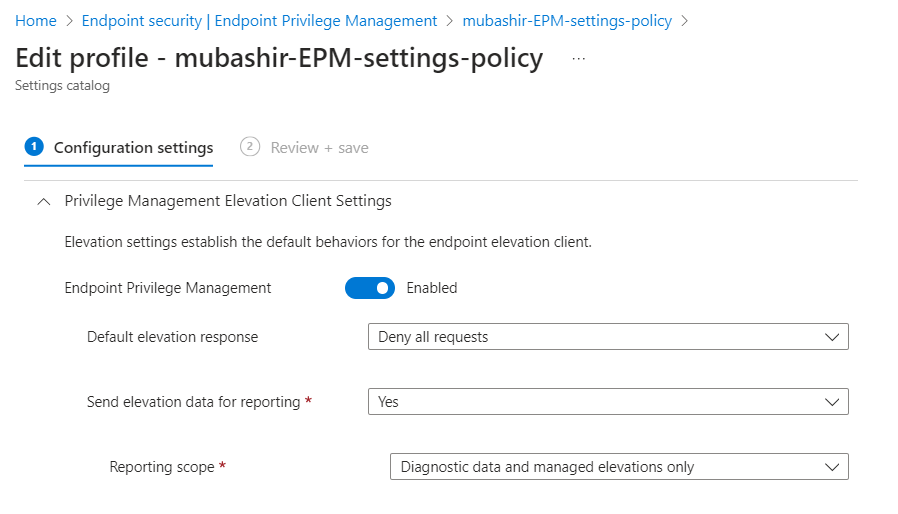
Step 2: Run application with normal user
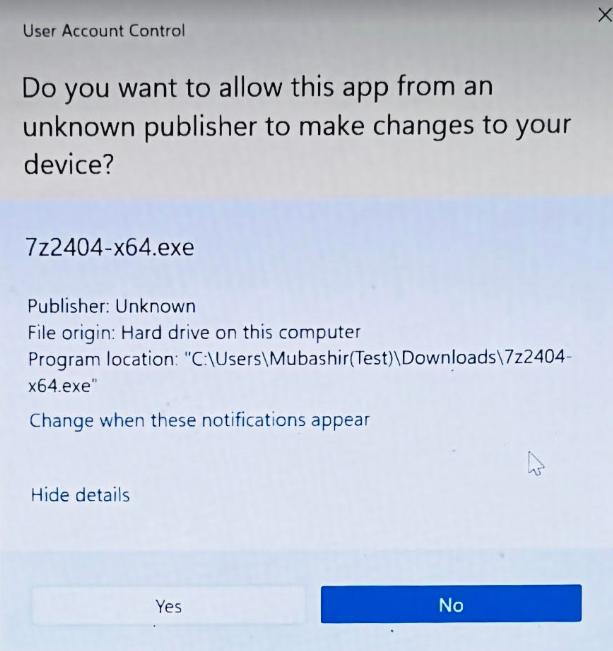
Once this is applied to devices, try to run an application, in this example i have downloaded 7zip and tried to install it, No app-locker policy is applied to devices yet. It will prompt you for unknown executable.
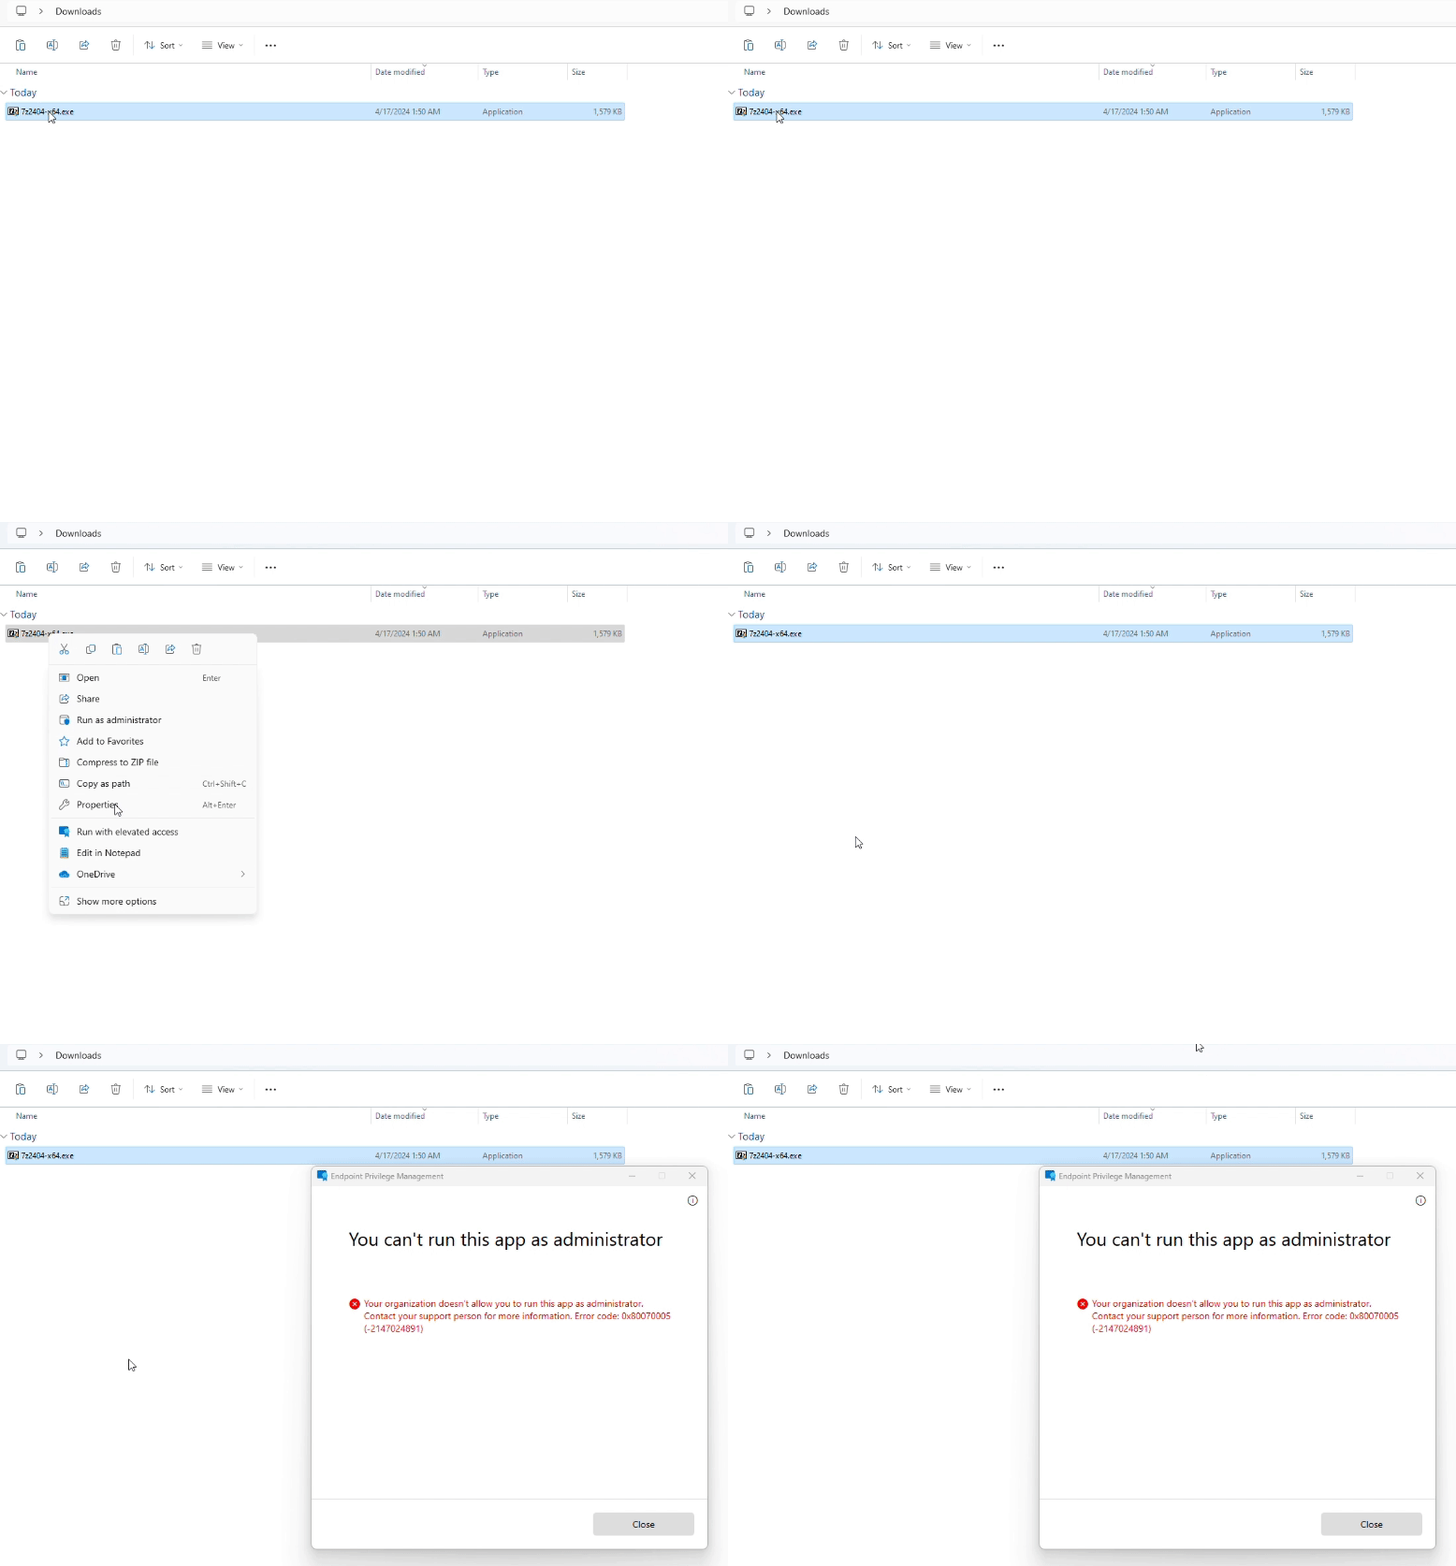
Further if you try to run the application with elevated access, Still it gives an error message mentioned below.
Step 3: Add elevation Rule policy
Next is to add elevation rule for the file (In our example we have 7Zip). Elevation policy is base on either hash key or certificate. Certificate is always recommended through. For “Elevation Type” it is recommended to user confirmed instead of automatic, so that we can catch user input while requesting application to run. Here is one of the example setup for 7zip application.
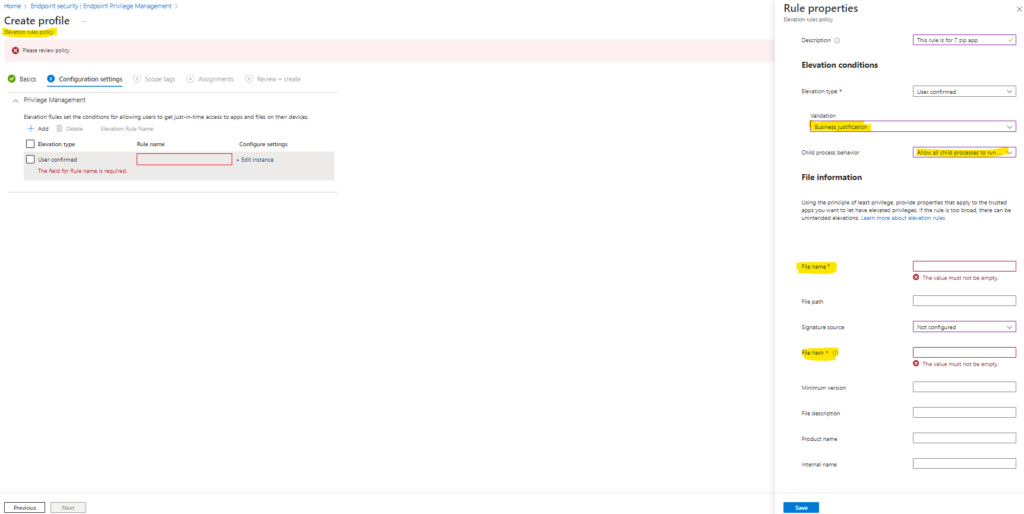
To get hash key of file, run PowerShell with user scope as run as admin is not required for this command. Run following command to extract hash key. Provide file name and hash key in area highlighted above, be-careful with spaces. If space remains at the end of start of file name/hash key, it will not run.
# Get file hash information
Get-FileHash -Path "C:\Users\Mubashir(Test)\Downloads\7z2404-x64.exe"
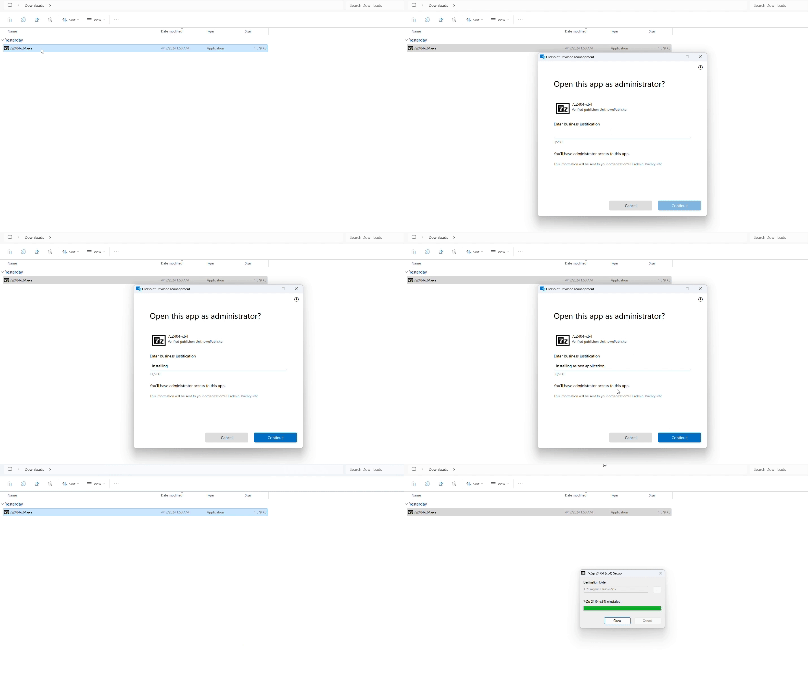
Sync your device and then run with elevated privileges, it will ask for justification and allow to run the application. Below is the example of this behaviour.
EPM allows IT administrators to create policies that dictate which users have access to specific resources and applications. This granular approach ensures that users only have access to the privileges necessary for their roles, reducing the risk of unauthorized access.
Before Implementing Endpoint Privilege Management
Implementing Endpoint Privilege Management involves several key steps:
- Assessment: Begin by assessing your organization’s current privilege management practices and identifying areas for improvement.
- Policy Creation: Define policies that outline which users/Devices require elevated privileges and under what circumstances.
- Rule Configuration: Configure rules and parameters that dictate when and how privileges are elevated. This can include factors like user role, application type, and time of day.
- Testing: Before full implementation, conduct thorough testing to ensure that policies and rules function as intended without causing disruptions.
- Rollout and Training: Deploy EPM across your organization’s endpoints and provide training to IT staff and end-users on the new privilege management framework.

